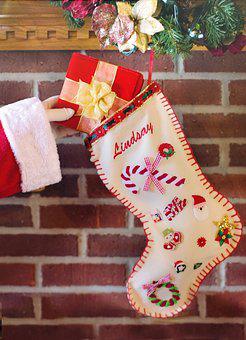
If a name isn’t embroidered on the stocking, how can you tell whose it is?
It’s easy with a sweet name tag you can hang on each Christmas stocking. If you’d like, you can purchase personalized name tags from Etsy. There are numerous choices. Or you can create your own inexpensive, simple custom name tag!
Table of Contents
What You Need:
- finished or purchased stocking that has a top embroidery space. Before affixing the back of your homemade stocking, embroider the name. If you’re adding stitches to a ready-made stocking, pin down the back so you can add the name on the front.
- Tissue paper
- pen
- computer screen
- pins
- embroider needle
- embroidery thread

Steps To Write Names On Stockings
Go to your computer and launch PicMonkey or a program of a similar nature as a first step.
After that, choose “design” from the top menu, choose a font, and type the name you want to be embroidered on a white screen.
Although Picmonkey offers a number of free fonts, I chose to use one that I had to pay for. For my adorable little Josie, who joined our family in May, I am making a special stocking.
When the name is a size that will fit comfortably on your stocking, resize it using the zoom in or out buttons on your screen.
After that, take your tissue paper and tape it to your computer screen.
On the tissue paper, trace the letters after that.
Grab your stocking and carefully remove the tissue from your screen. The tissue paper should then be placed in the middle and pinned close to the stocking’s top.
Then grab your embroidery needle and thread. Backstitch each letter of the name using two threads in a contrasting color.
You’ll be sewing through the stocking and the tissue paper, as seen in the image below.
One of the simplest stitches is the backstitch. One stitch follows another in a simple, straight line.
The only piece of advice I can give you for this step is to take your time and make small, precise stitches.
Even though it might take longer, you are, after all, making a family heirloom.
An item that your child will eagerly pull out and hang up year after year. Doing it right is worth the effort.
After the stitching is complete, the tissue paper should be taken out.
Making sure to get all the little bits, very carefully tear the tissue paper and pull it off in pieces. You’re done once you attach the back to your stocking!
Do you see how easy that was? Pretty names can be embroidered on stockings by even you and I!
And here are the four stocking patterns I provide in case you’re looking for a few:
As seen in the illustration, felt letters that have been cut out and sewn onto the stocking can also be used to add a name.
When you buy one of the above-pictured patterns, you get those directions and patterns. For $9 when purchased as a set, or $3 each when purchased separately, are the stockings.
