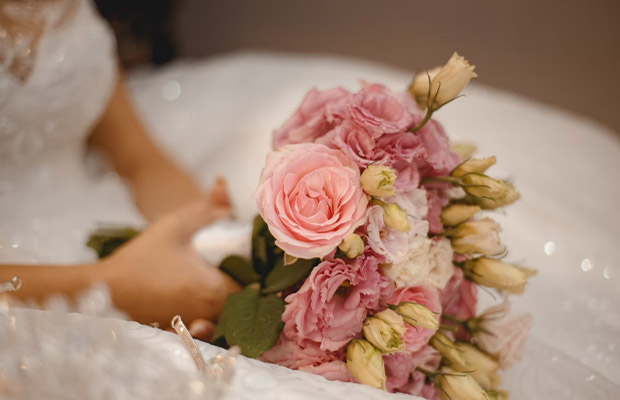
We can probably all agree that a vase of fresh flowers makes a room feel cozier. They add a touch of natural beauty, whether they are arranged in a romantic bursting bundle or in a straightforward low arrangement on a table lit by candles. We will, however, be the first to admit that learning how to make flower arrangement properly can occasionally be stressful for us.
Luckily, the beautiful professional bouquets you admire at events or dinner parties are easy to recreate once you know how to arrange flowers
Discover flower arrangement techniques to make a bright, attractive bouquet. Use these flower arranging tips to present blooms in a beautiful way and keep them looking good.
Table of Contents
Steps To Make Flower Arrangement
1. Choose The Style Of The Flower Arrangement
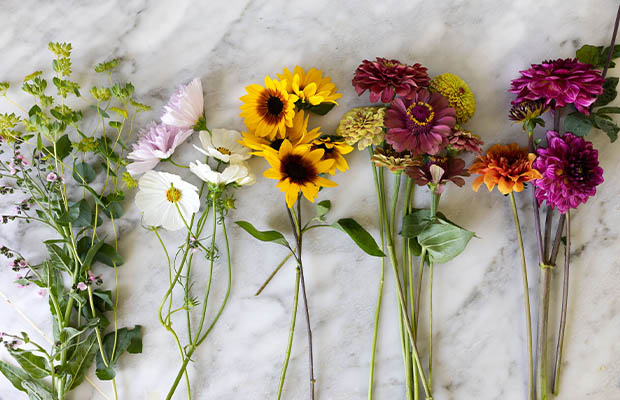
A color scheme you choose before you go flower shopping can help direct your arrangement. Afterward, you can buy flowers with confidence knowing that you’re choosing complementary colors. Monochromatic designs can be eye-catching because they highlight the variety of shades of a single color. Use complementary colors that stand out against one another to create a floral arrangement with even more impact.
There is really no way to go wrong when pairing flowers, even if you are methodical about your color scheme. According to Moss, you should choose flowers based on what’s in bloom in your garden or what you can find at the neighborhood market. “The key is to be open-minded and see what you are drawn to,” she says. “You may miss out on other attractive candidates if you narrow your search too much.” Choose your favorites, each with a unique growth pattern, shape, and size, and try to combine them.
2. Cut And Prepare Flowers
You might feel tempted to start arranging your flowers as soon as you get home with them. To make flowers last longer, there are some crucial preparations that must be made. Initially, trim any extra leaves and broken petals from stems. Cut off any extra buds if they are growing on the same stem as a full flower. After the stems have been thoroughly cleaned, make a new diagonal cut at the stem’s base. Put the trimmed stems in a vase or bucket of water along with some cut flower food (this doesn’t have to be your final container).
3. Select A Ship
Think about the type of flowers you’re using before choosing a vase or other container for your arrangement. For example, tulips typically require the support of a straight-sided vase, while tall branches or top-heavy flowers may require a weighted vessel, according to Moss. She prefers to store floral arrangements in woven baskets rather than traditional vases to add a more natural texture. Line the basket with a plastic container (look in your kitchen cabinets or upcycle plastic water bottles and another packaging) to hold water and keep the flowers in place. To conceal the container inside the basket, moss can be used to fill in any gaps.
4. Create Your Flower Vase
The most crucial flower arrangement technique has nothing to do with the flowers themselves; instead, it’s all about the container you use to hold the flowers. The flowers won’t stay in place if the foundation is weak, and your arrangement will crumble as a result. Make a grid of floral tape over the vase’s mouth to keep the flowers in place. To keep the stems in place, insert them through the holes in the grid. A floral frog, a vessel insert with pins for stems to be stuck into, is also an option; it costs $7 at Michael’s. With a little chicken wire bent into a ball, you can even make a floral frog yourself.
5. Use Vegetation To Build A Base
Starting with greenery as a base will help you arrange flowers the best. Ivy, eucalyptus, and fern fronds are reliable choices for greenery. To make an upside-down triangle, use the greenery’s stems. This ensures that both a horizontal and a vertical presence will be present in your arrangement. Prior to placing the stems in the vase, remember to trim them again.
6. Add The Focal Flowers
Typically, focal flowers are the ones with the biggest blooms or those with unusual colors or textures. For a more natural-looking (rather than symmetrical) appearance, add odd numbers. Avoid positioning the focal flowers so that they stick out straight from the sides; this will make them appear droopy and heavy rather than strong and perky. You can view the vase from all sides without having to move it if you set it on a lazy Susan.
7. Include Filler Flowers.
Fill the space around the focal flowers in the arrangement with smaller flowers and textural elements. One more time, avoid arranging all of the auxiliary flowers vertically or laterally. Consider the arrangement as having a dome-like shape; in order for the arrangement to look finished, all of the dome’s angles must be filled in. Clustering, which occurs in nature, is created by grouping smaller flowers into groups of three or five.
8. Finish The Flower Arrangement
Add floaters or delicate blooms like baby’s breath, sedum, or yarrow to complete the arrangement. To prevent them from being crushed or buried by larger blooms, place these last. Give your finished flower arrangement a light mist of water before displaying it, advises Moss, to create the appearance of dew. To keep the flowers hydrated and fresh, fill the vase with water as necessary.
5 Flower Arranging Formula
Here’s this simple 5 item formula you need to remember every time you go to the store to pick up your floral items:
- Height/Something tall– Something tall is required to help determine the arrangement’s height. Olive branches, long pieces of greenery, tall flowers or foliage, tree branches, etc. all work well here.
- Filler/Something Lush – Anything round, lush, and plentiful will help shape and fill out the arrangement, such as flowers with multiple stems, leaves, or greenery. For this, greens are excellent! Consider thicker varieties of greenery, such as ferns, ivy, evergreens, and even kale, swiss chard, and herbs! Pick up lovely fillers and other items for your arrangement by strolling down the produce aisle of your local grocery store (more on this later). The best place for this is frequently your own backyard, and since it’s free, what’s not to love?
- Center/Feature/Star – The focal point or feature element is the highlight of the arrangement when you look at it. In the cluster, this flower is the largest. These are typically positioned in the center, possibly even slightly off to the side. but mostly in the middle of the setup. Consider dahlias, hydrangeas, and big-flowered roses when choosing a bouquet. Beautiful fruits and vegetables like artichokes, peppers, and pomegranates can also be your feature element.
- Accent/Something Smaller – The accent pieces give your arrangement some interesting color and texture. Select a filler item that is distinct from the feature flower and smaller in size. To your arrangement, these accents merely lend interest.
- Vessel – An interesting container makes an arrangement look much better than one that is plain and uninteresting. Maybe you have something that was handed down to you in the family. Maybe you found something intriguing at a flea market? Decorative items include footed urns, vintage vases, colorful or unique-shaped containers, and footed urns. It’s also fun to think outside the box when choosing containers; pitchers, old jars, low bowls, and terracotta pots can all be very stylish.
Extra: How To Use The DIY Floral Grid?
Add a few stems of greenery to start, and if necessary, hold the grid in place with one hand. The order in which the stems should enter the holes is not determined by a mathematical formula. Just keep in mind to cross the stems inside the vase as you insert them through the grid.
The grid should be stable enough to remain in place once four or five greens have been added to it, allowing the design to be completed quickly.
The grid’s greatest benefit is that it eliminates any ambiguity regarding the best order to arrange the flowers in the vase. Any expert designer may already be aware of the best placement for different stem types and bloom types.
Consumers, hobbyists, and even novice or semi-professional designers might not be aware of it, though. In contrast to using a grid-taped vase, using the grid allows you to arrange the components in any order while ensuring that all of the blooms and foliage remain in their original locations.
It’s crucial to keep in mind that nothing should extend past the grid line and into the water, including any vegetation or flowers. However, inserting stem laterals into the grid will help to reinforce the design once the tool is gone.
When the desired appearance and the right number of stems have been added, use the tabs to separate the grid pieces and then slide the two pieces out of the arrangement.
The arrangement is complete with not a posey out of place. It is simple to use this tool countless times while quickly moving on to the next arrangement.
How Much Time & Material Can Be Saved With DIY Floral Grid?
Math fun is now in order. 60 yards make up a roll of floral tape. (So, 60 yards of single-use plastic, to be clear.) Grid taping a vase typically uses one yard of tape.
Therefore, you can grid tape about 60 vases using a single roll of tape. Additionally, it takes a designer about 45 to 60 seconds to grid tape a vase’s top completely. Using up a whole roll of tape means almost an hour of just taping!
Instead, in about three seconds, put together a DIY Floral Grid and place it on top of a vase! then utilize the grid tool endlessly. Time and money saved!
More To Explore: