Now is pumpkin season! Want to learn how to wash pumpkins? You’re in the right spot! These cleaning hints will be useful whether you intend to cook with or carve your pumpkin.
It’s much simpler than you might think to clean a pumpkin. With the right equipment, you can quickly prepare your pumpkin for cooking or carving.
Using various tools, you will discover how to safely and quickly clean out a pumpkin. Let’s get started!
Table of Contents
How Do You Get Everything Out of a Pumpkin?
Cutting your pumpkin in half will make it easier to remove the seeds when cleaning it for cooking. It goes without saying, though, that if you plan to use it as a jack-o-lantern, you must drill a hole in the top or the bottom of the pumpkin to remove the seeds.
Making jack-o-lanterns by carving the top is customary, but poking a hole through the bottom of the pumpkin is actually safer. By carving the bottom, you can smooth the area where your candle will go and extend the life of the pumpkin.
The bottom or top of your pumpkin, depending on your preference, should have a medium-sized hole cut out of it using a long serrated knife. So that you can easily scrape the inside of your pumpkin, the hole should be slightly larger than your fist.
How to Clean Out a Pumpkin for Carving?
You can quickly prepare a pumpkin for carving with a few tools and these how-to instructions. Use one of our free printable stencils to personalize your Halloween pumpkin.
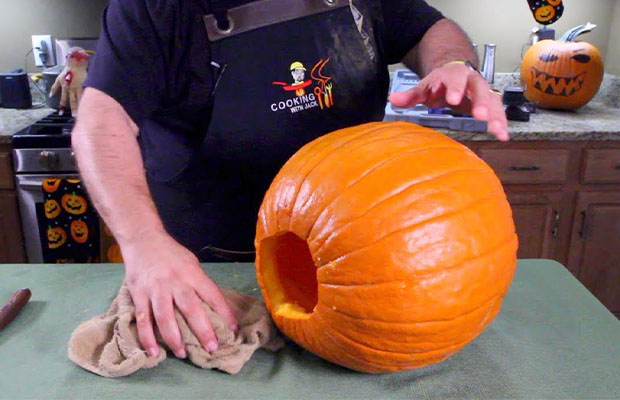
Step 1: Cut a Hole in the Bottom of the Pumpkin
Chances are, if you’ve ever carved a pumpkin, you cut a circle around the stem and peered inside through the top to remove the flesh. But rather than starting at the top of the pumpkin, we believe the key to carving the ideal pumpkin is to start at the bottom. Your pumpkin’s lifespan will be extended as a result of this.
Make a medium-sized hole in the bottom of your pumpkin; it should be bigger than your fist but smaller than the circumference of your hand so that the cut edge won’t be noticeable when you stand the pumpkin up. For this step, use a long, thin serrated knife.
Create two cuts (beginning at the circle’s edge and facing the pumpkin’s center) to create a small triangle-shaped notch after you’ve finished carving a circle. Use the notch to pull the remaining portion of the circle away from the pumpkin after poking the triangle shape out.
Step 2: Remove the Pumpkin Guts
The enjoyable part—removing the pumpkin guts—comes next after you’ve cut off the bottom third of the rind. We have a few suggestions for anyone who doesn’t enjoy the sensation of squishing pumpkin guts between their fingers, even though reaching in with your bare hands would certainly accomplish the task.
- Use a large scoop; you can find ones with serrated edges in some pumpkin carving kits, or look for a large, semi-curved utensil from the kitchen, like an ice cream scoop.
- Make use of a metal scoop. If used too firmly, plastic scoops or spoons could break.
- To quickly and painlessly remove the remaining portions of the pumpkin’s interior, scrape the sides with a small knife, such as a paring knife, to separate the interior rind from the remaining guts.
Editor’s Tip: Don’t discard the entire pumpkin’s interior! You can roast the seeds for a tasty snack.
Step 3: Scrape the Inside of the Pumpkin Clean
Once the stringy pumpkin interior has all been removed, return to the inner rind and thoroughly scrape it clean. Use the scoop you previously used, or a flat scraping tool that is included in some pumpkin carving kits ($15, Amazon). Scrape the sides of the pumpkin until they are completely free of all strings and extra loose material. This will allow for a smooth, clean cut when you begin carving a design into the pumpkin.
Editor’s Tip: There are some tools that will make the job of cleaning out and carving pumpkins much easier, but you don’t need to buy a special set of them. Consider purchasing one of these carving sets for pumpkins.
Tips for Caring Pumpkins
- Look for any rotting or weak areas throughout the pumpkin, especially near the stem. On most pumpkins, this is typically where rotting can begin.
- Pumpkins should not be placed in direct sunlight as this will hasten their rot.
- If you wash pumpkins or use any of the suggestions below, make sure they are completely dried before displaying them.
- Additionally, keep pumpkins in a cool environment. They will also rot more quickly in the heat. If you need to store them or revive them if they begin to rot, you can also put them in the refrigerator.
Can You Wash Out the Inside of a Pumpkin?
To prepare a pumpkin for a jack-o-lantern, you must rub, spray, or soak it in a solution of vinegar or bleach and water. Vinegar and diluted bleach can help stop the development of bacteria and postpone the rotting of your pumpkin.
If you decide to soak your pumpkin for 15 minutes, let it dry naturally before coating the insides with petroleum jelly or vegetable oil once more. Mold and dehydration can be avoided by coating the interior with one of these two substances.
Read More: How to Make Orange Garland?
FAQs
How to Wash Pumpkins With Vinegar?
All you do is put 1 part vinegar and 10 parts of water into a larger container and stick your pumpkin inside.
How to Preserve Uncarved Pumpkins?
Smear petroleum jelly all over the outside and inside of your pumpkin to keep it from drying out. Combine petroleum jelly, hairspray, acrylic finish spray, and Tabasco sauce to repel insects.
How to Keep Pumpkin Fresh After Cutting?
The best way to store cut pumpkin is to wrap it tightly in cling wrap and place it in the fridge.
Does It Hurt Pumpkins to Get Wet?
Too much rain can delay planting and cause crops to rot. Mildew can harm leaves and stems and even kill pumpkin vines and fruits because they prefer moist environments to flourish in.
Takeaway
After cleaning the pumpkin inside and out, wipe the interior walls with a solution of water and bleach. To enjoy your carved designs for a longer period of time, use the bleach mixture to stop rotting.
Squirrels and other animals that might try to eat your pumpkin artwork can be deterred by the smell of bleach.
Read Next: How to Dry Oranges Slices?