You’re in luck if you’re a 90s baby or just need something soft to tie your hair back. Make your own fabric hair scrunchies quickly and easily!
Although the historical status of this fabric hair accessory is somewhat debatable, there is no denying its usefulness as a soft hair tie and enjoyable DIY sewing project.
Continue reading to learn how to make a scrunchie using a sewing machine—a very simple sewing project that anyone can complete. And fun!
Table of Contents
What Is A Scrunchie?
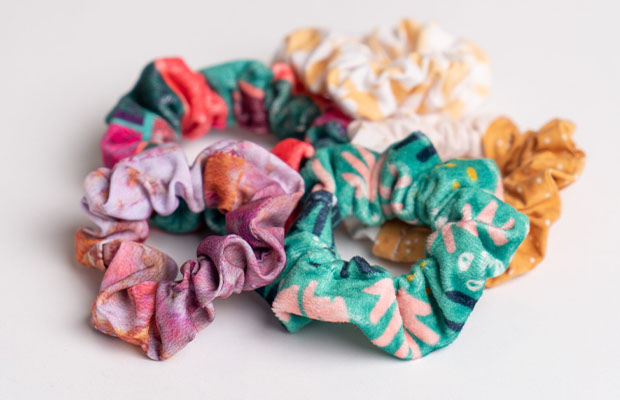
A hairband covered in a fabric called a scrunchie has an invisible elastic inside and gathered fabric on the outside. They are fantastic for coordinating with your attire and giving your hair a pop of color.
The fact that no elastic can catch or rip your hair makes them the best option for silky, healthy hair.
If you were alive in the 1980s and 1990s or have ever watched Seinfeld, you are familiar with what a scrunchie is. The scrunchie received its own entire episode.
Scrunchies are making a major comeback, and even my neighborhood newspaper ran an article about how many scrunchies were seen this season on the runways of high-end fashion houses. Fashion always makes a comeback.
The scrunchie can be wrapped around the top of a bun, a ponytail, or the base of a plait.
Instructions To Make A Scrunchie
1. Gather Materials
The elastic you use for a scrunchie can be knit or braided.
Beginners should stick to working with light- to medium-weight woven fabrics; quilting cotton is best. Try a lightweight stretch velvet or velour instead of the heavier materials as demonstrated above for a different feel, but pay attention to the fabric’s nap.
Note: Avoid wearing silky, slippery clothing because it tends to slide out of the hair. Use a different style of ponytail holder underneath the scrunchie if you decide to wear this type of fabric to match an outfit to prevent it from sliding.
2. Cut And Press The Pieces
Cut an 8″ long piece of elastic.
Using a rotary cutter (or fabric scissors), cut a 3″ x 22″ strip of fabric. Press each of the 3″ wide ends under 1/4″ with wrong sides together, to form a crease for the final stitching.
If you want to add an optional decorative tie on the scrunchie, cut a 3″ x 8″ strip of matching fabric, then fold it in half the long way. Measure and cut from the fold to 1 1/2″ in from the non-folded edge to form a point at each end.
3. Sew The Main Scrunchie Tube
Fold the 3″ x 22″ strip in half right sides together, matching the long sides, right sides together, unfolding the 1/4″ crease that you pressed. Matching the raw edges, pin the elastic at one of its short ends. Using a 1/4″ seam allowance, sew across the short end where the elastic is pinned, pivot at the corner, then sew down the long edge. Reinforce the seam all the way across the elastic by backstitching or locking the stitching at the beginning and end. As the elastic pulls, this stops the stitching from unraveling.
4. Turn The Scrunchie Right Side Out
To the elastic’s loose end, fasten a safety pin. Using a chopstick, the blunt end of a pen or pencil, or a tube turner if you have one, turn the tube right side out from the open end and pull the safety-pinned end of the elastic out the open end.
Turning the fabric right-side-out requires holding onto the end of the elastic, which the safety pin facilitates, or fastening it to a stable object (by pinning it to the cover of an ironing board).
If it’s difficult for you to hold the elastic while turning the tube, turn the tube inside-out first, and then use the safety pin to pull the elastic through the scrunchie. then continue to push the fabric downward.
5. Attach Elastic Ends Together
According to the illustration, sew across the elastic from the loose end to the scrunchie’s closed end. If you haven’t done so already, take out the safety pin and fold the scrunchie’s open end toward the inside along the fold line.
6. Close The Gap To Cover The Elastic
Make sure the seam is in the same place all the way around the scrunchie by straightening the fabric.
With the elastic exposed, slide the open end of the scrunchie over it and sew straight across, backstitching both the beginning and the end.
You can see the stitching more clearly in these pictures because the thread isn’t matching, but you should use matching thread throughout the entire project.
7. Sew The Extra Tie Piece
It’s optional, but this component of the scrunchie adds a cute touch.
Fold the 8″ strip with pointed ends in half, right sides together. Using a 1/4″ seam allowance, sew from one point in toward the center, then stop. Sew from the other point in toward the center, and then stop, leaving a 1″ to 2″ gap for turning.
To lessen bulk, trim the seams at the corner points. After that, turn the tie inside out and press.
Close the opening by tucking the seam allowance inside. Using a whip stitch, you can complete this by hand. Or, for a faster finish, sew the opening on your sewing machine, stitching about 1/16″ from the folds of the gap. Once attached to the scrunchie, this seam is hardly visible, so it doesn’t have to be flawless.
8. Add The Tie To Your Scrunchie
Put the extra piece through the scrunchie’s elastic seam and tie it there. A single, tightly wound knot works just fine. In addition to hiding that seam, this object serves as a playful decoration.
Which Fabric To Use For A Scrunchie?
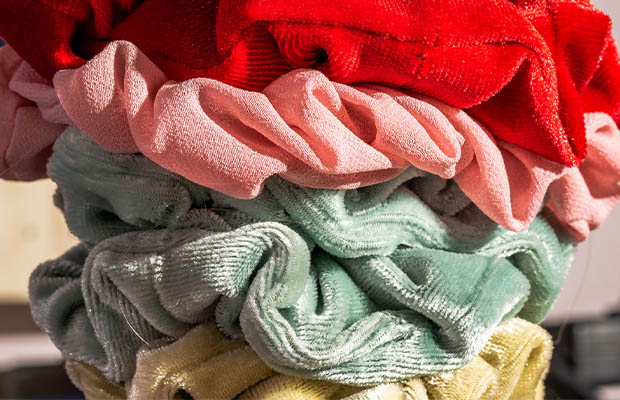
You are not constrained to cotton in terms of the materials used. Even though velvet scrunchies are quite common, you can use any material.
Slippery silk or poly are shiny and provide a polished appearance, but they may be more difficult to work with when sewing. Additionally, I don’t really enjoy wearing them because they are too likely to fall off my head.
Cotton is also always a safe bet. You can wash poplin whenever you want, and it works wonders.
How To Make A Scrunchie Variations?
You can decorate your scrunchies in numerous ways such as:
- Add some lace or piping to the seam. In step 2, incorporate it into the seam.
- Sewing sequins or beads in strategic places
- Making an extra-large scrunchie that twists around your hair extra times
Read More:
How To Make The Scrunchie Bow?
- In accordance with the pattern, cut 2 pieces of fabric.
- Place the fabric pieces right sides together.
- Where indicated on the pattern piece, leave a gap while stitching around the bow.
- Trim the curves and corners, then exit the proper direction.
- Press.
- The edge of the bow shape should be topstitched. The gap can be closed with handstitching if you don’t want to topstitch.
- To conceal the joint, wrap the scrunchie in the bow.